Create a PAT in Azure DevOps and GitHub

Personal Access Tokens or PATs for short, can be used to programmatically access both Azure DevOps and GitHub. I recently had to create a PAT in GitHub for the first time and thought it was unnecessarily hard to find. I use Azure DevOps daily and it seemed more logically placed within the GUI, but when I thought about it more, is this the case? You still have to navigate through a few steps to find them. It also took me a few minutes of reading the first time I had to create one. So I thought I would put a few steps together.
Create a PAT in Azure DevOps
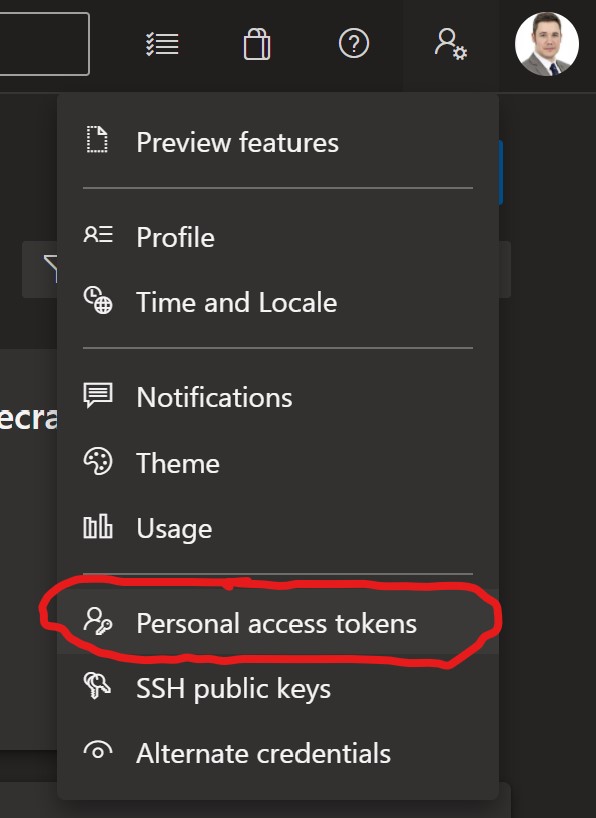
- Log into Azure DevOps and click the user settings icon in the top right of the screen next to your user avatar.
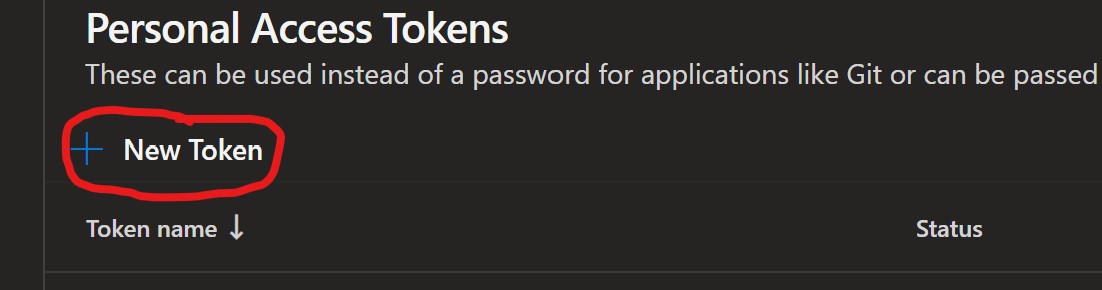
- Click the + New Token
- In the top half of the form, you enter a name, pick your DevOps organisation and an expiry date for the PAT.
The bottom half of the form allows you to choose what permissions you require for your PAT. Initially, you are shown a small list of the most popular permissions. However, if you click the link that I have expertly circled (I give lessons, my rates are reasonable), you will be presented with the full list of available permissions.
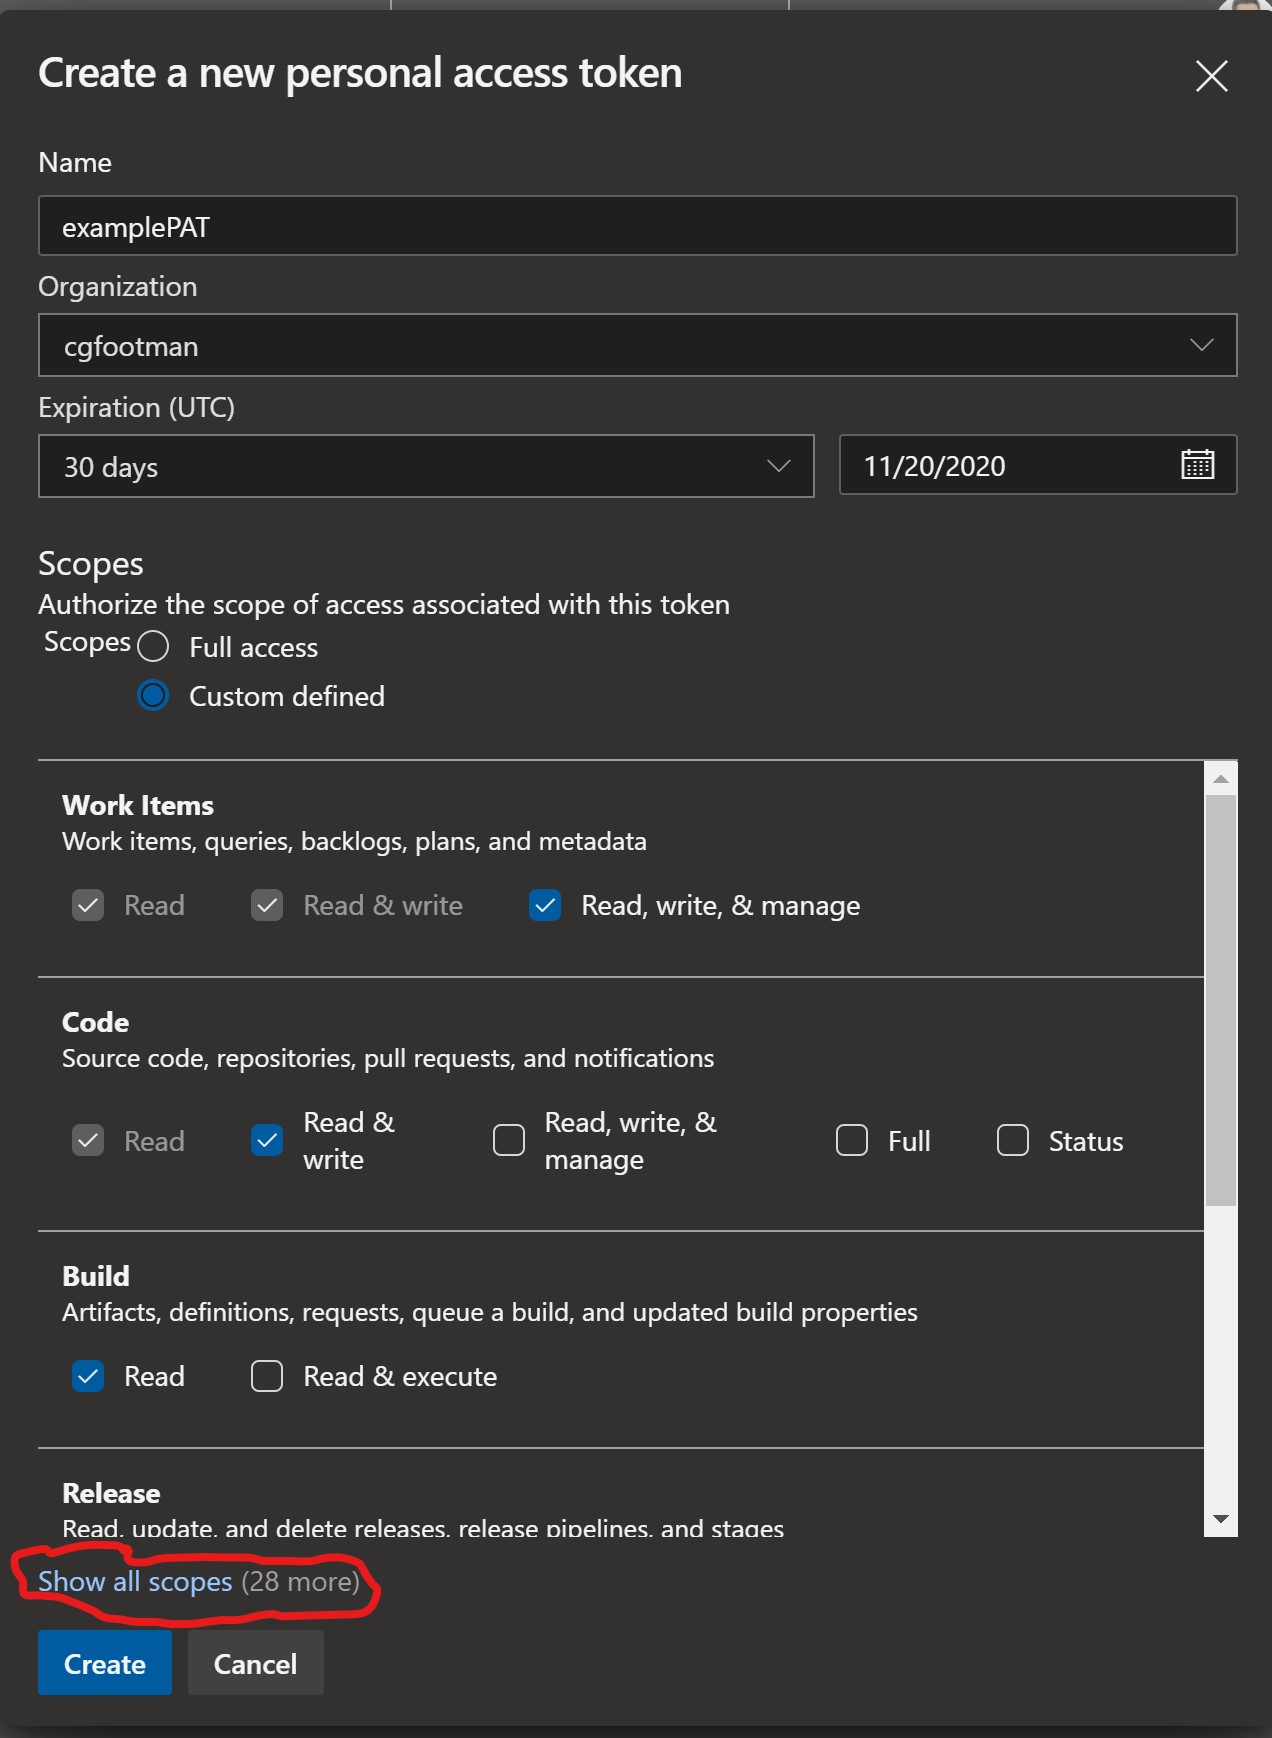
Click Create
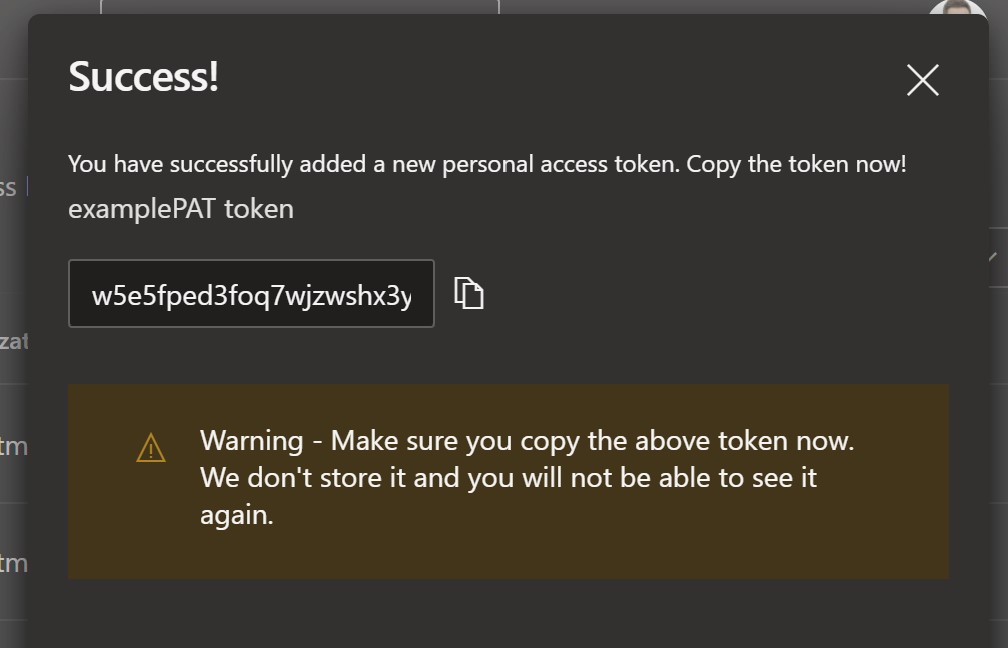
On the success dialog box, you will be presented with your new PAT token. This is the only time you will see this specific code, so make sure you copy it (using the handy button) before you close the dialog.
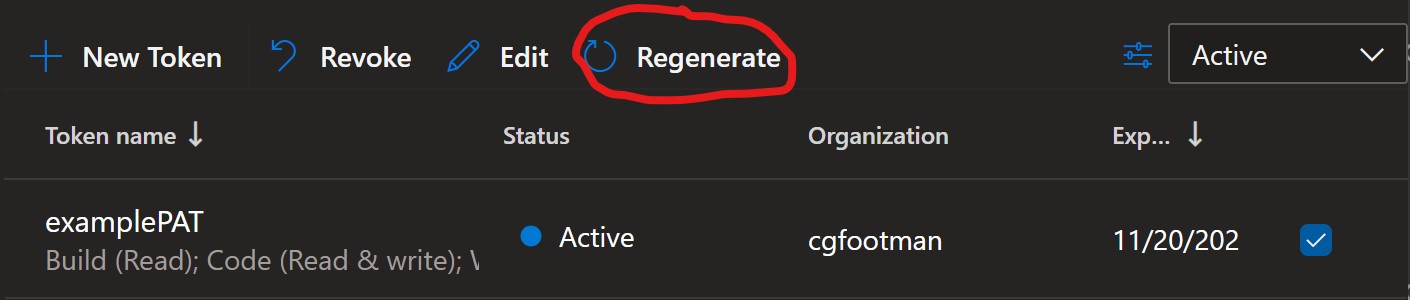
If you didn’t record the PAT before you closed the success dialog (SHAME!) then it’s not the end of the world. From the Personal Access Token screen, you can select your PAT and click the Regenerate button and it will provide you will a new PAT.
Create a PAT in GitHub
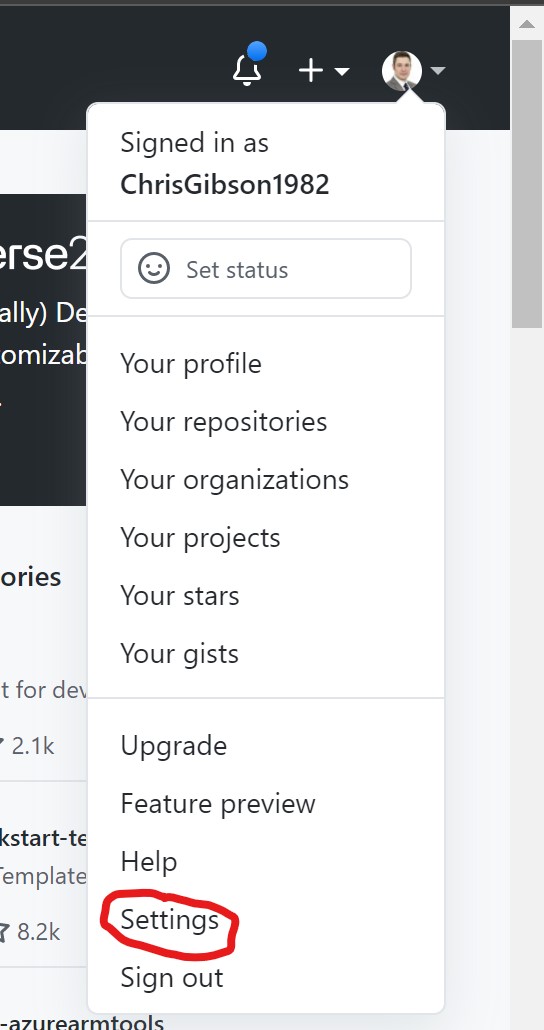
- Log into Github, click on your avatar and select Settings from the menu.
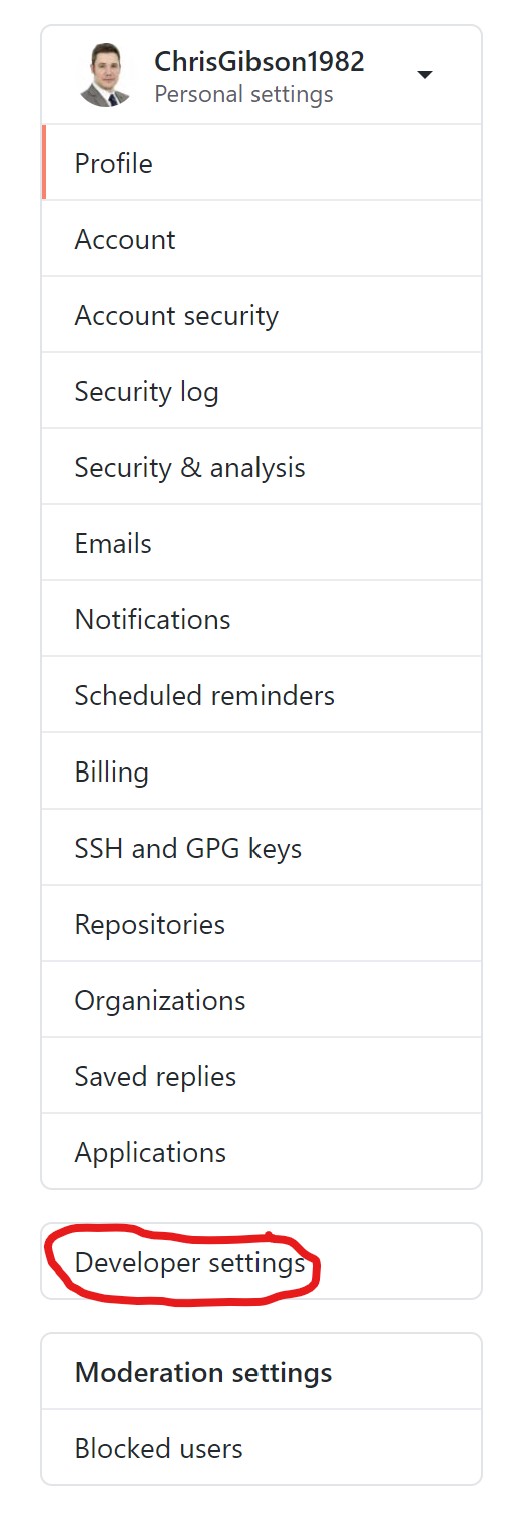
- In the settings menu, select Developer Settings.
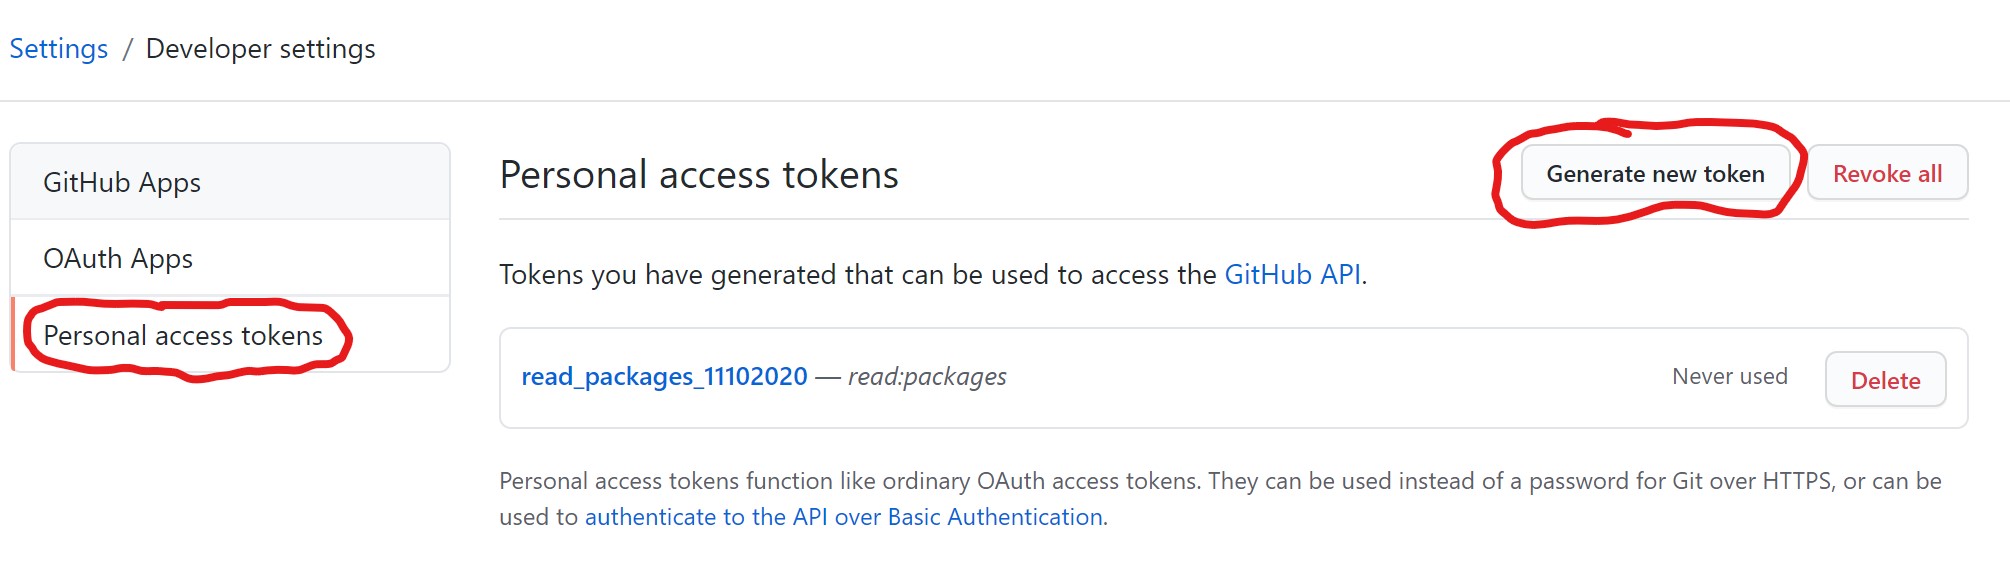
- In the developer settings menu, select Personal access tokens.
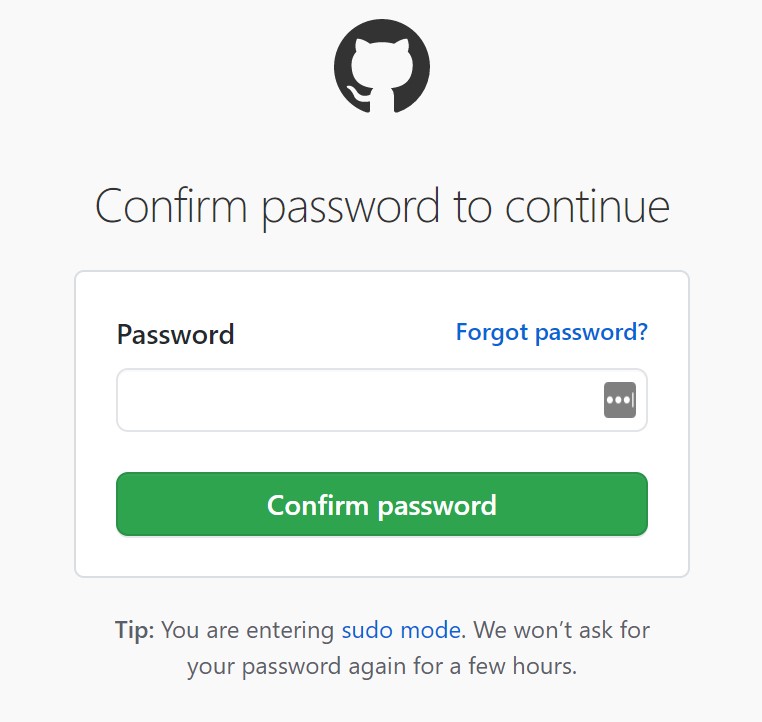
- You may be prompted to re-enter your password.
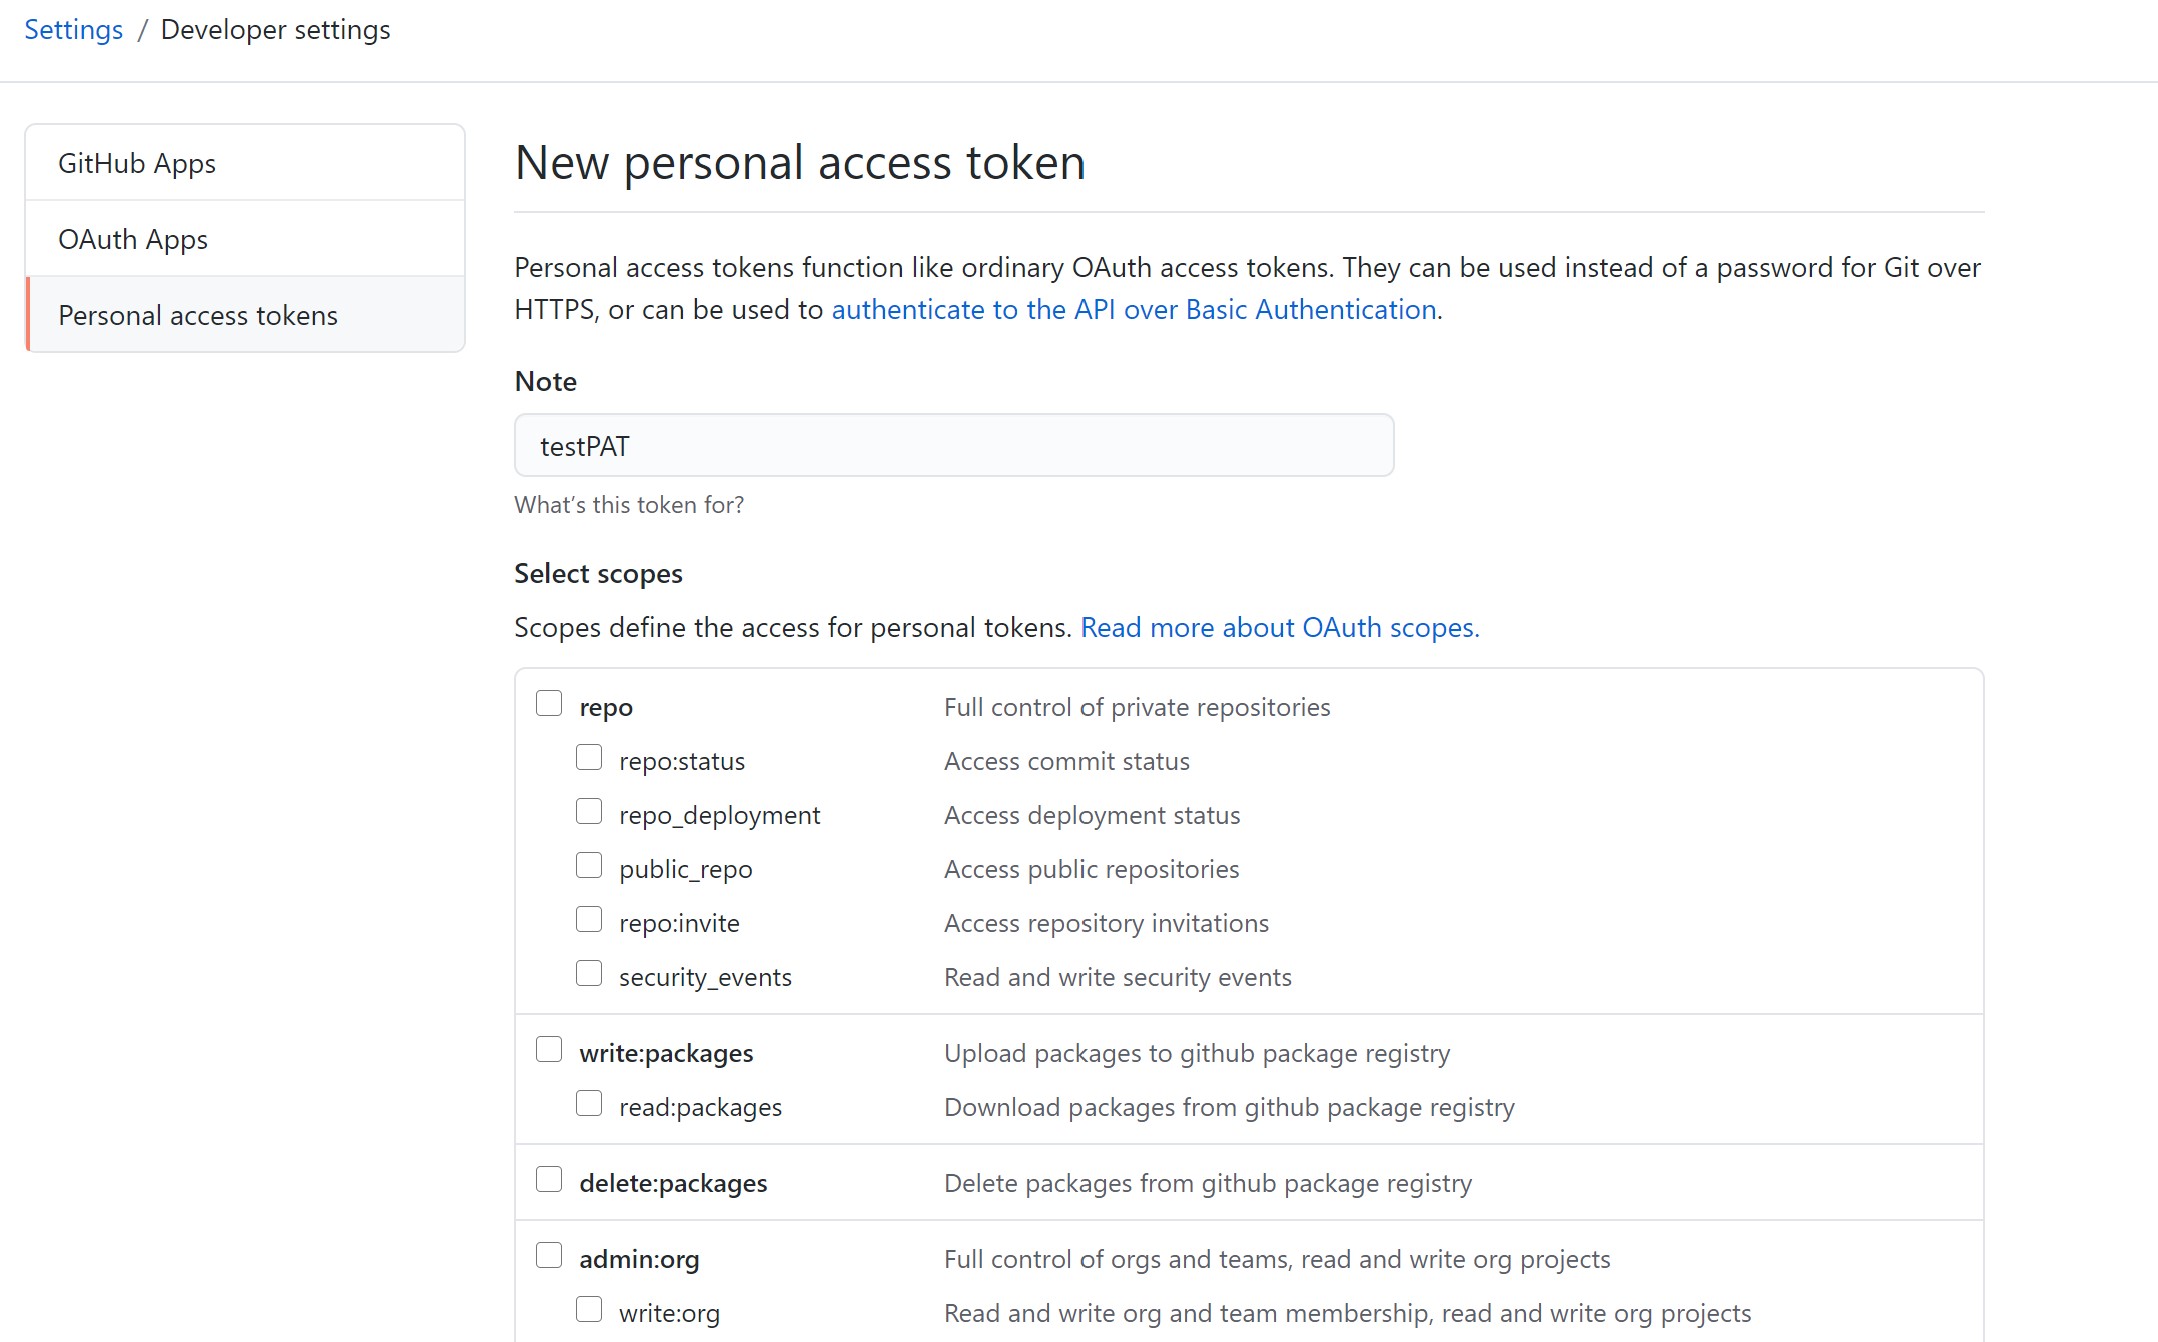
- Enter a Note to identify the PAT and select the permission it needs.
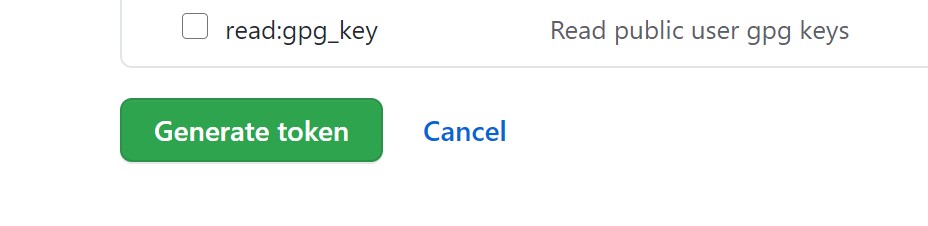
- Click the Generate token button to create the PAT.
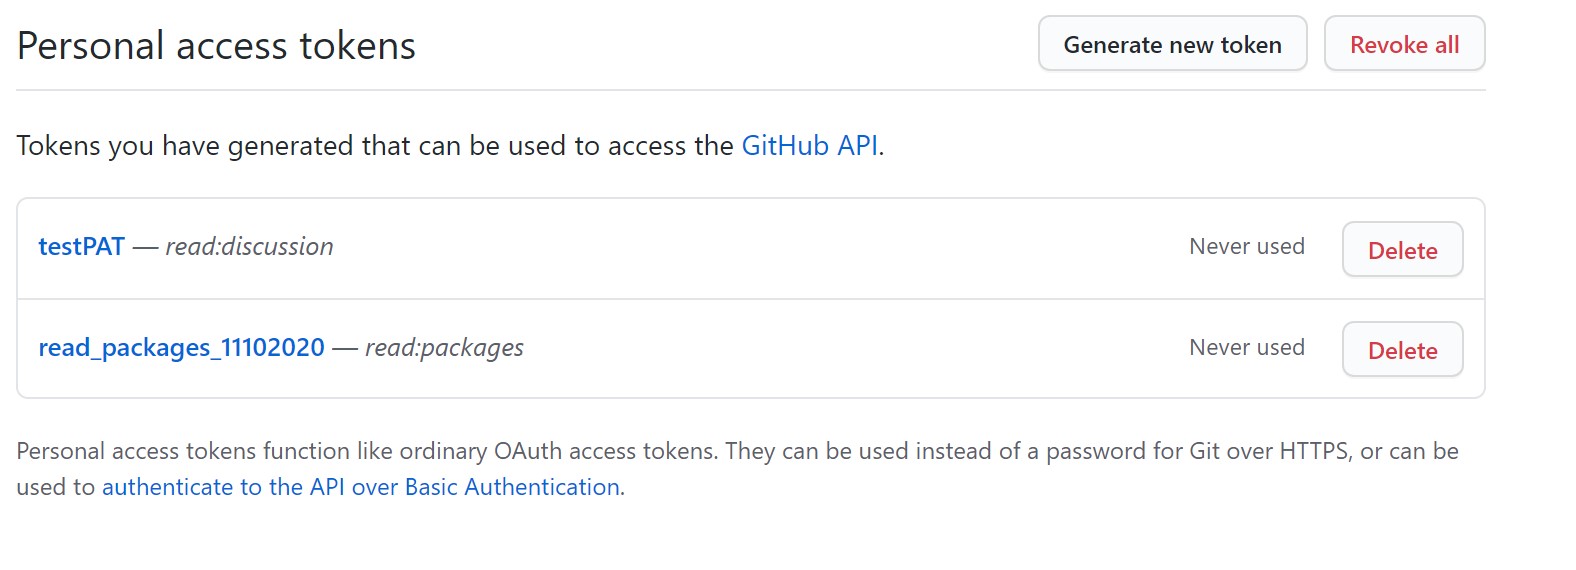
- Copy the PAT as you won’t see this specific code after you leave this screen.
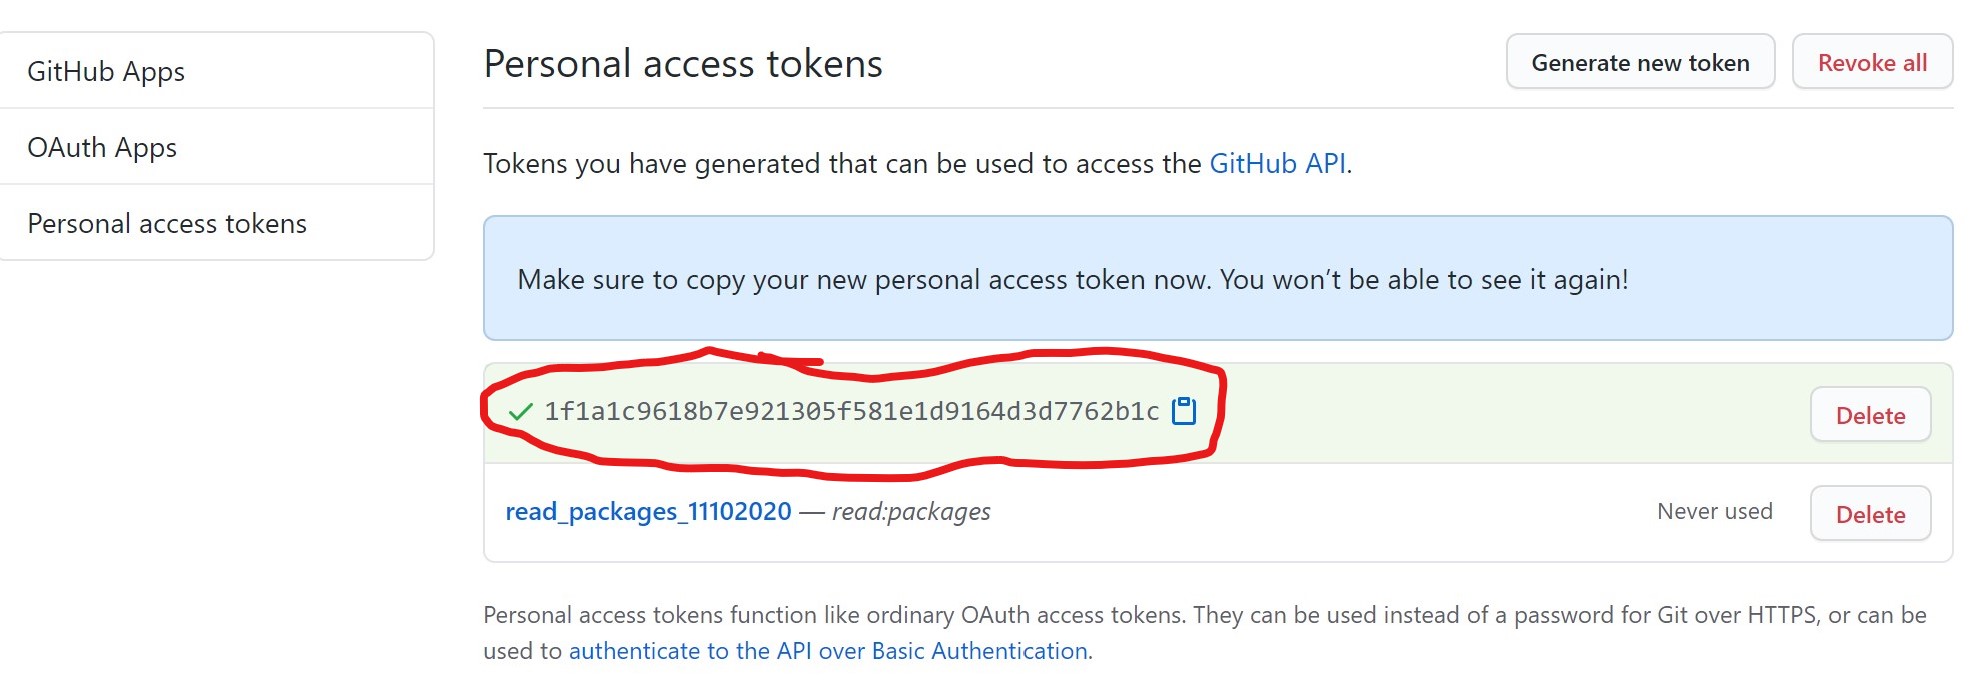
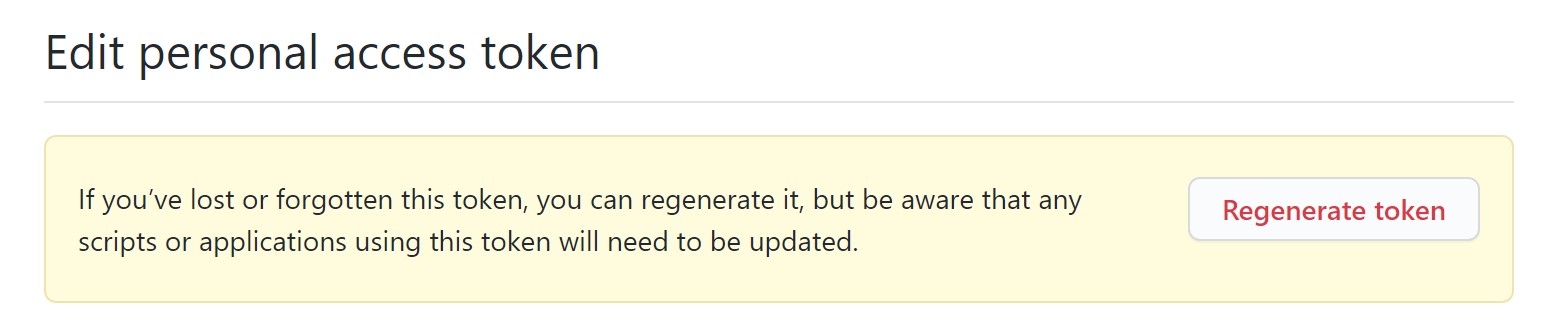
If you didn’t copy the code, you can regenerate it. Find your PAT in the list and click on its name.
Then click the Regenerate button.
I hope these steps are clear and save you some time, but if you have any questions, please let me know in the comments.